

Managing DNS Records
Once you've added a domain and it's using Vercel's nameservers, you can view its DNS records from your team's Domains page. From there, you can view, add, verify, remove the records, or add presets.
To make sure DNS records are applied, and to allow you to manage them, your domain needs to use Vercel's nameservers . If you are using a third-party domain, you will be provided with the Vercel nameservers to copy and use with your registrar.
On your team's dashboard, open Domains in the sidebar. From the Domains page, click on a domain of your choice to view its Advanced Settings page.
Once on the Advanced Settings page of your domain, select the Enable Vercel DNS button to fill out the DNS Record form. Once complete, click on the Add button.
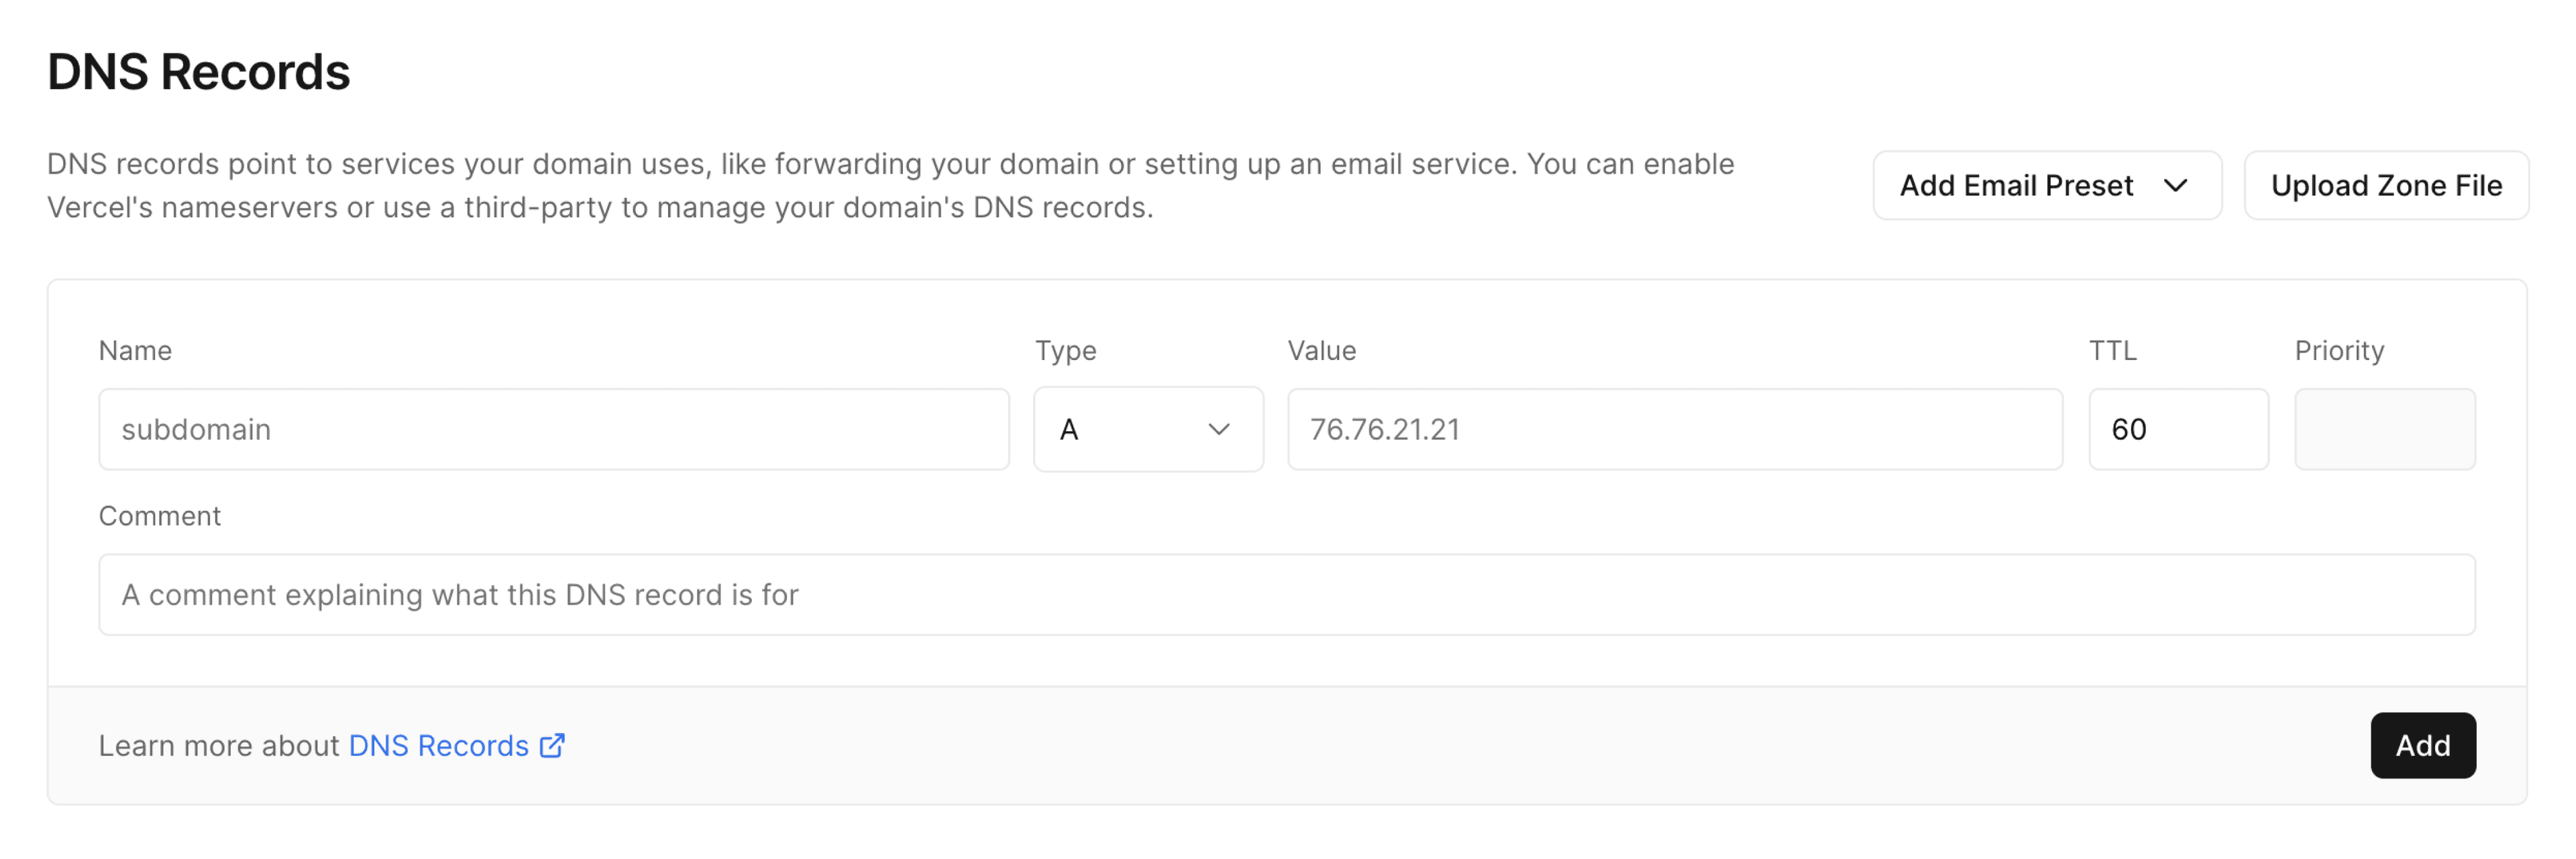
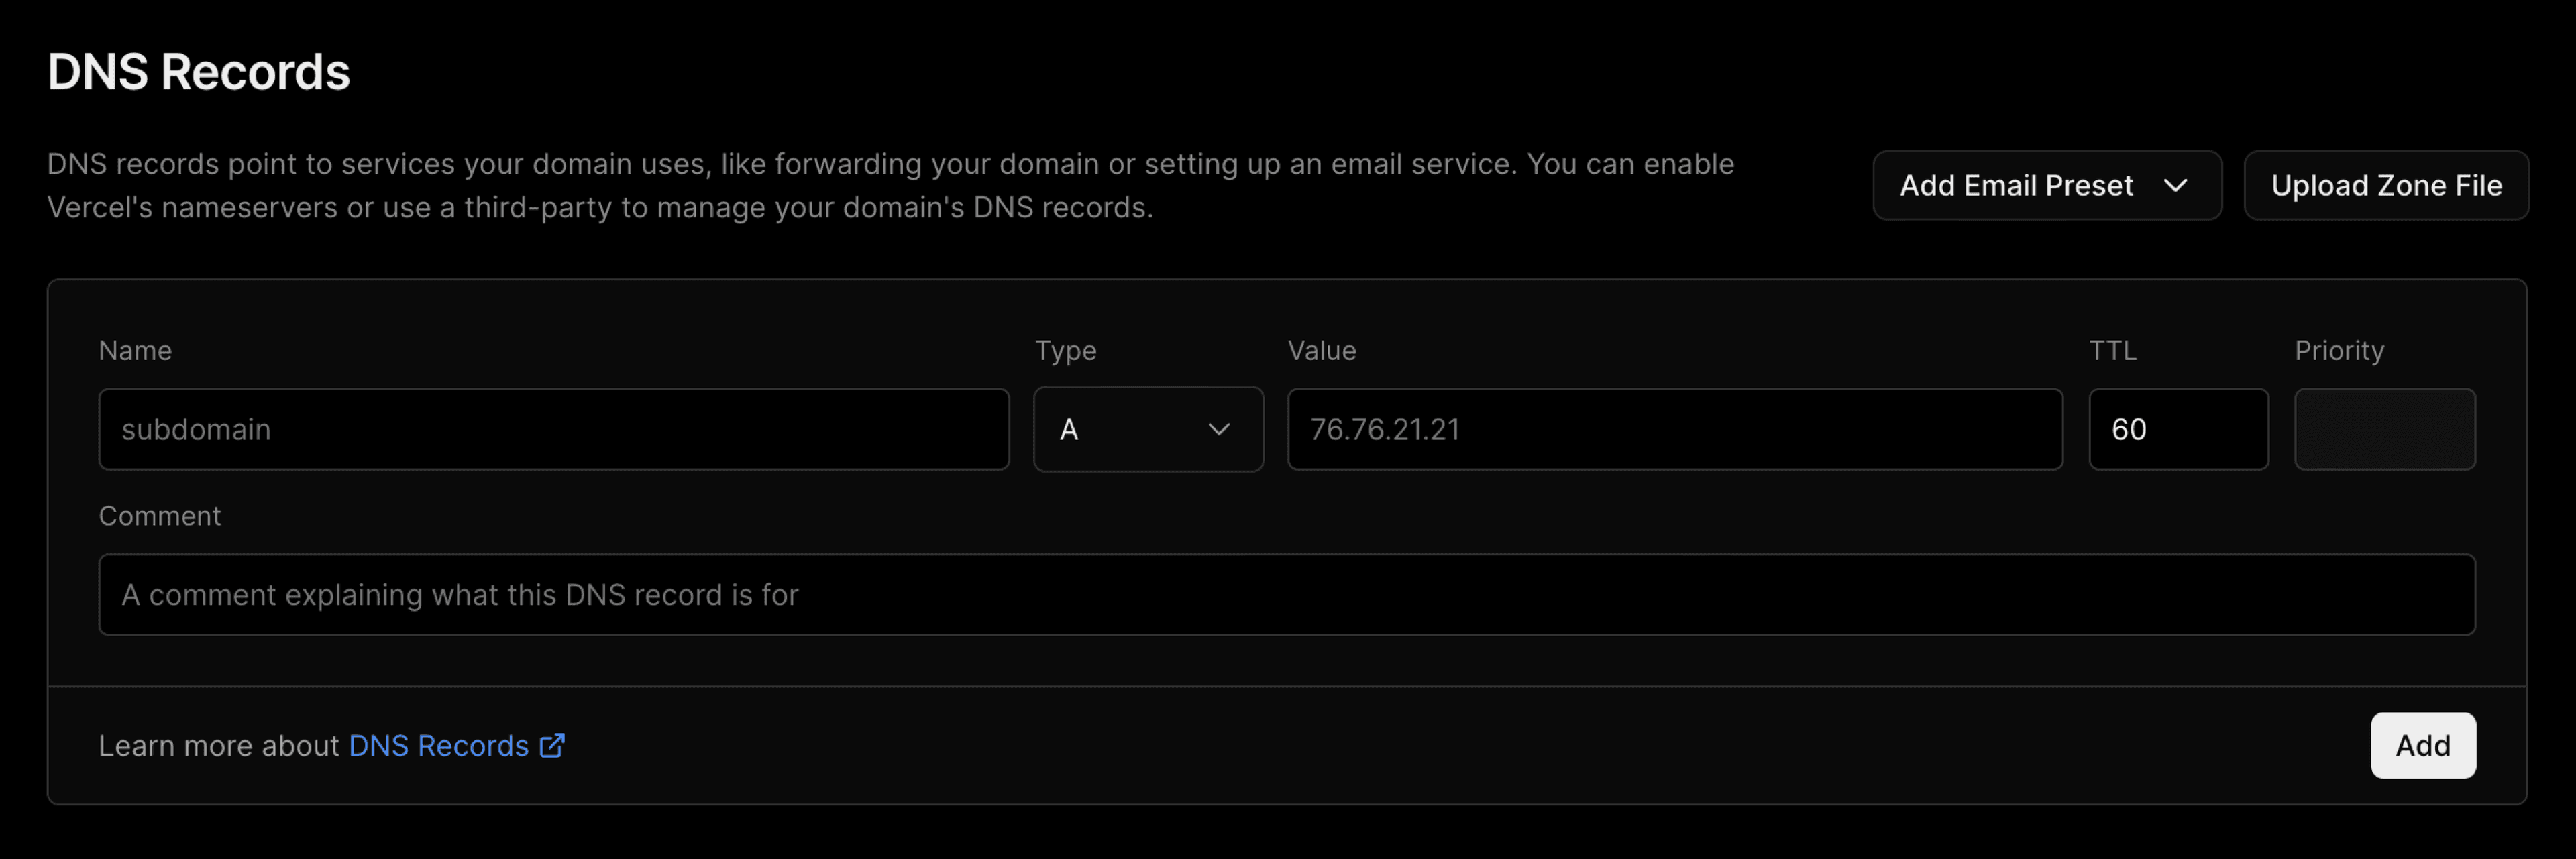
DNS Records form to add a new DNS Record. You can then create a new DNS record with the following data:
- Name: The prefix or location of the record. For www.example.com, the name argument would be www.
- Type: Types can be
A,AAAA,ALIAS,CAA,CNAME,HTTPS,MX,NS,SRV, orTXT. - Value: The value of the record.
- TTL: Default is 60 seconds. For advanced users, this value can be customized.
- Comment: An optional comment to provide context on what this record is for.
- More: Some records will require more data. MX records, for example, will request "priority".
Once a DNS record has been added, it can take up to 24 hours to the DNS records to fully update and any local caches to be cleared.
Once DNS records have been changed, you may wish to check that these have been set correctly. There are many third-party tools that do this, such as DNS Checker and DNS Map - these show the state of your DNS records in different regions of the world.
You can also use the dig command to check the DNS record for your domain:
$ dig A api.example.com +short$ dig MX example.com +shortTo remove DNS records:
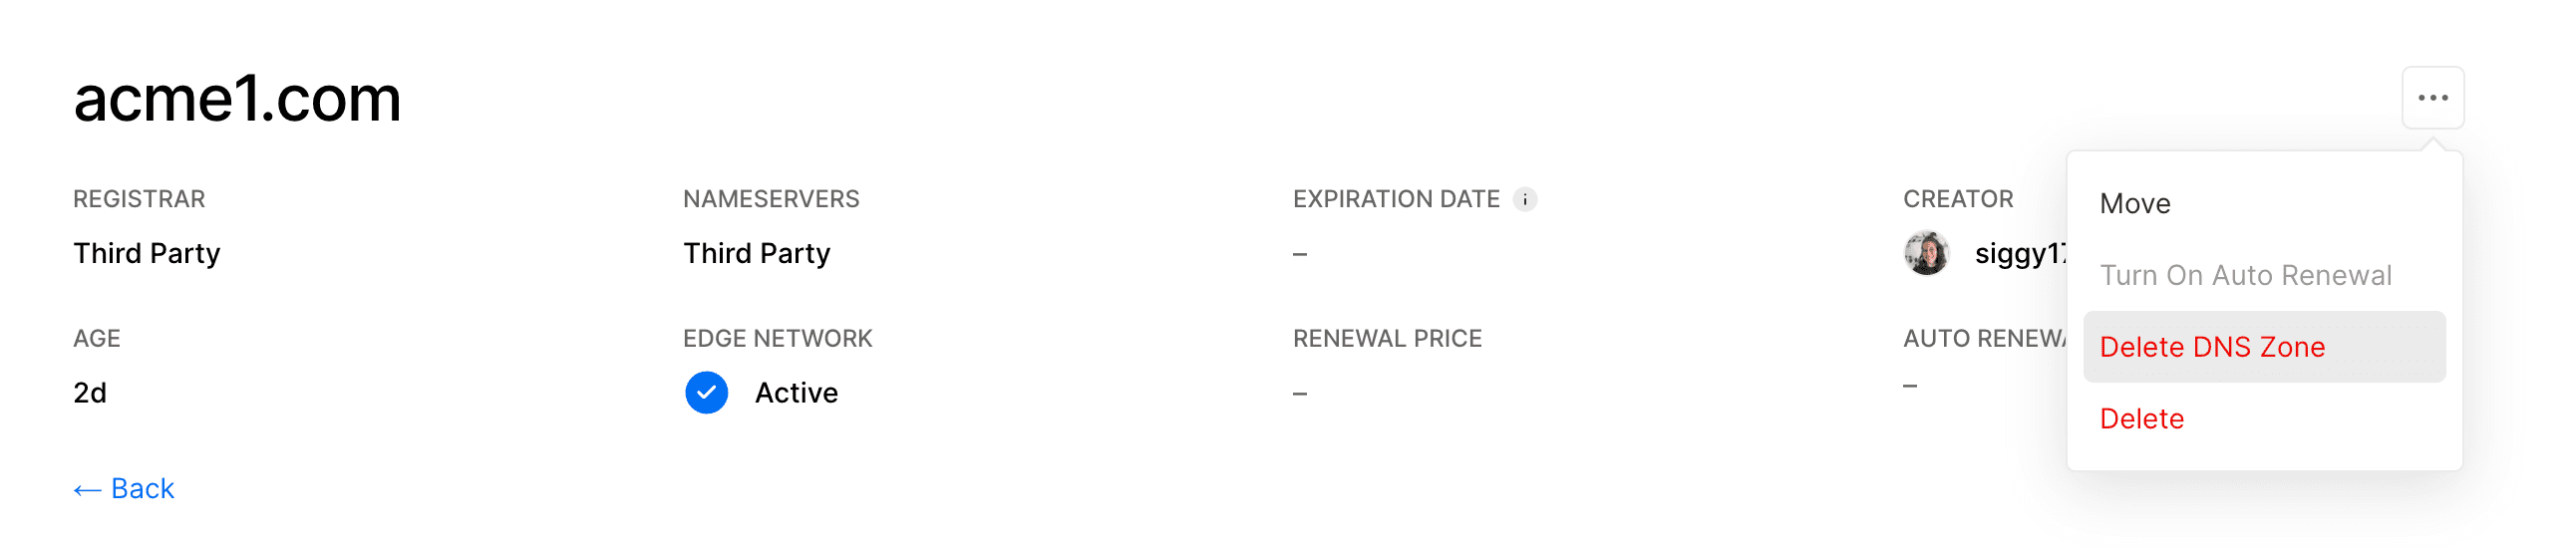
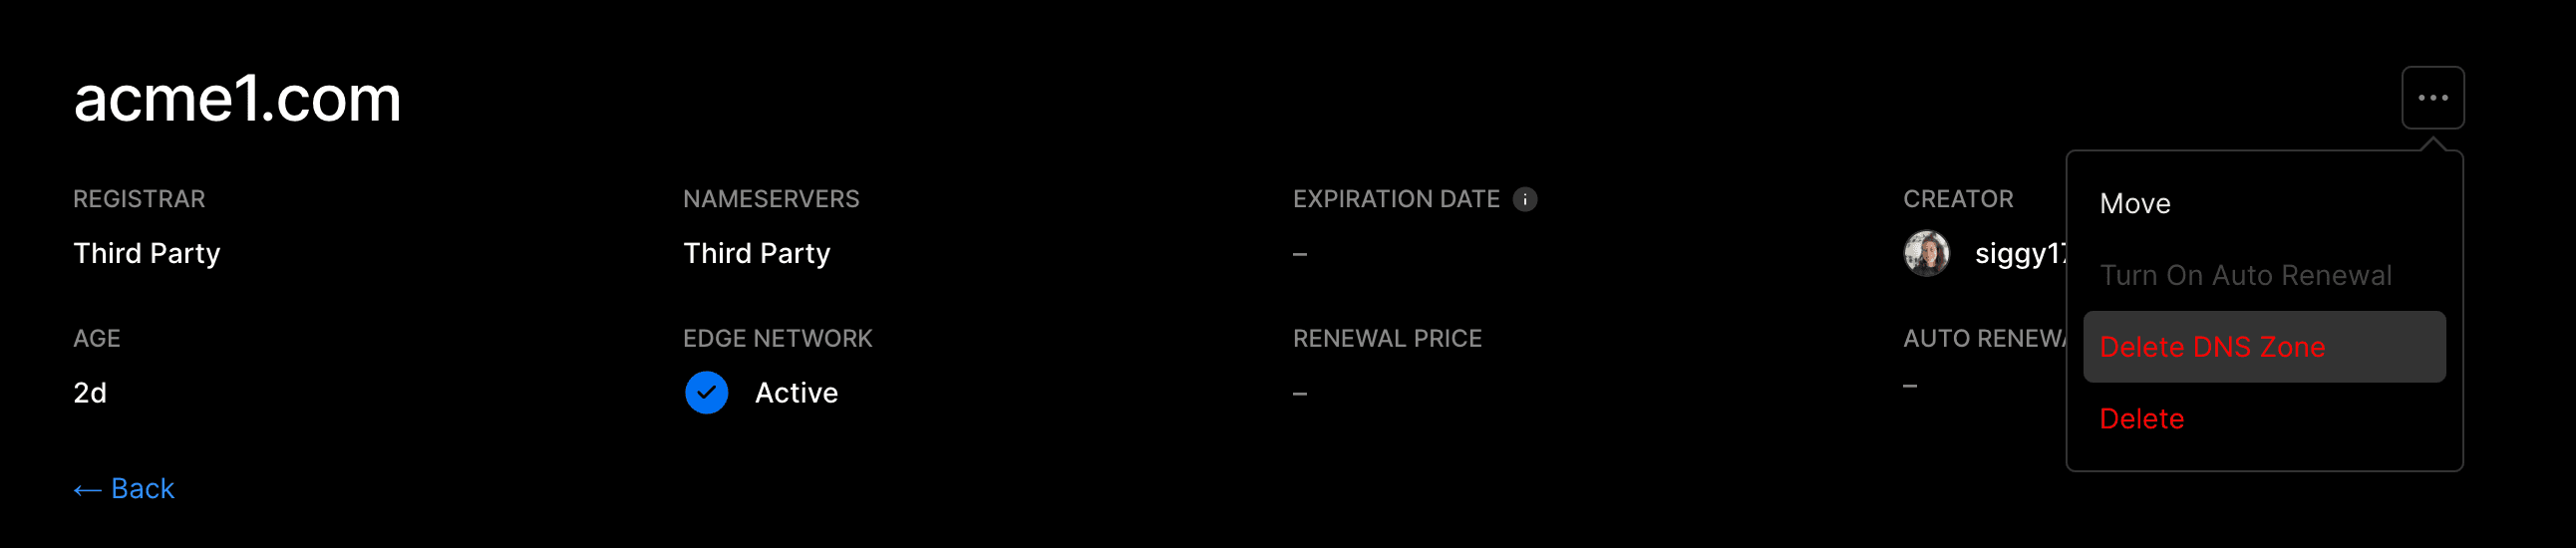
- On your team's dashboard, select the Domains section in the sidebar. From the Domains page, click on a domain of your choice to view its Advanced Settings page.
- Select the ellipsis (⋯) to access the context menu and select Delete DNS Zone. Follow the prompts to delete the record.
Default records can't be removed. However, new records can override them if required.
Vercel does not provide an email service. To be able to receive emails or add specific DNS configurations through a domain that you've added to Vercel, you need to add the respective DNS Records, such as MX for email or TXT for other services.
Vercel streamlines this process for common third-party services by allowing you to add missing DNS Records using DNS Presets on your dashboard.
- From your dashboard, open Domains in the sidebar.
- Select the domain you wish to add a preset to and click the Add DNS Preset dropdown on the right:
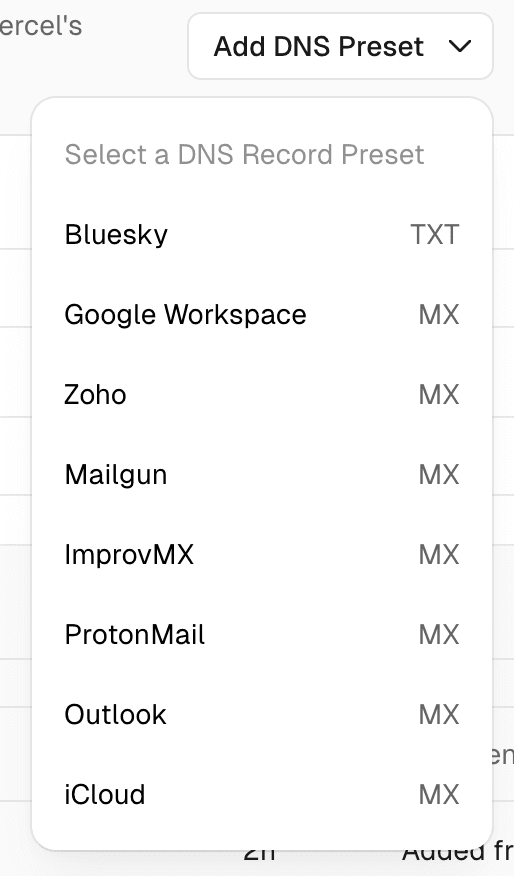
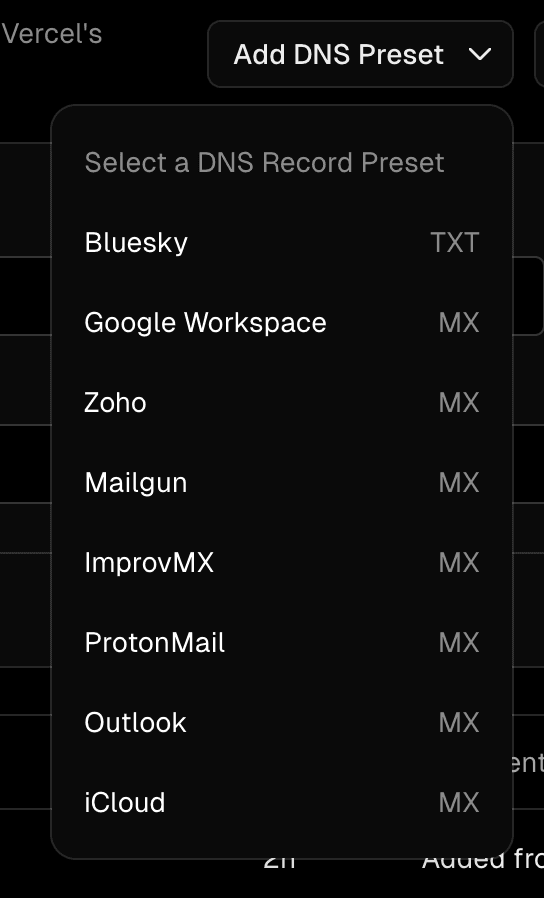
- You will be presented with a list of commonly used third-party providers. If your provider is listed, select it, and the necessary DNS Records—such as MX for email or TXT for other services like Bluesky will automatically be configured on your domain.
If your provider is not listed, please refer to their documentation to find out which DNS Records you need to add.
Once you have added a domain to your Vercel project and also verified the certificate is working as expected, you can choose three options of records to finally complete the migration: A, CNAME, or Nameservers. In case you decide to use an A or a CNAME record, then you can change those records in your DNS provider to make Vercel serve your deployment from the selected domain, as instructed on your dashboard.
If you decide to change the Nameservers of your domain, you can follow the below instructions which will help you migrate your DNS configuration from any provider and avoid downtime.
To locate the current DNS provider of your domain, you can run the following command:
$ dig NS example.com +shortThe result will show the current DNS authority. Next, you'll need to locate your DNS records from the provider's dashboard.
After you've successfully located all records associated with your domain, you may now add them to Vercel. You can either do this manually or by importing a zone file.
Importing a zone file
If you have downloaded a zone file from your existing file, you may use the following comand to upload that to Vercel:
vercel dns import [your-domain] [zonefile]If you do not apply a custom zone file, transferring in a domain automatically applies the default Vercel DNS settings.
To verify the records, you can now query the DNS configuration that will be served by Vercel:
$ dig A api.example.com +short @ns1.vercel-dns.comChecking the DNS configuration of the A record under "api" served by Vercel.
Then, check the DNS records from the existing provider to make sure they match. If you were moving your DNS from Cloudflare, for example, the correct command would be:
$ dig A api.example.com +short @example.ns.cloudflare.comChecking the DNS configuration of the A record under "api" served by Cloudflare. The example should be replaced with the authoritative nameserver given by your provider.
Before proceeding, we recommend checking every record you moved. For more insight into the DNS resolution, remove the +short flag.
In your registrar's dashboard (where you bought the domain), change the Nameservers to your new provider. Nameserver changes can take up to 48 hours to propagate. If you bought the domain from Vercel, you can manage nameservers from the domains page.
Was this helpful?