Using flags in SvelteKit
Learn the best practices for creating feature flags in SvelteKit by using the @vercel/flags/sveltekit package.- Install the Vercel CLI using the following command:
pnpm i -g vercel@latest- Install the
@vercel/flagspackage:
pnpm i @vercel/flags- Set up your SvelteKit application:
This will prompt you with a number of questions to create your app. Choose the following options:terminal
npm create svelte@latest sveltekit-flags-example cd sveltekit-flags-example npm install npm run dev- Choose demo app
- Choose TypeScript
- Choose Prettier
- At this stage the project only exists locally and not on Vercel. Use the following command to link it to project on Vercel:
terminal
vc link - Add
FLAGS_SECRETenvironment variable. Run this command to create a secret:Then store the secret as theTerminalnode -e "console.log(crypto.randomBytes(32).toString('base64url'))"FLAGS_SECRETenvironment variable, and select all environments when prompted.terminalvc env add FLAGS_SECRET - Finally, pull any env vars from your project on Vercel locally
terminal
vc env pull
- Set up your SvelteKit application:
- Install the
@vercel/toolbarpackage:pnpm i @vercel/toolbar - In your
vite.config.tsfile add toolbar plugin for vite:vite.config.tsimport { sveltekit } from '@sveltejs/kit/vite'; import { defineConfig } from 'vite'; import { vercelToolbar } from '@vercel/toolbar/plugins/vite'; export default defineConfig({ plugins: [sveltekit(), vercelToolbar()], }); - Next render the toolbar in your layout so that it's visible for your visitors. This renders the toolbar for all visitors. In production you may want to render it for team members only:
src/routes/+layout.svelte
<script lang="ts"> import type { LayoutData } from './$types'; import { mountVercelToolbar } from '@vercel/toolbar/vite'; import { onMount } from 'svelte'; onMount(() => mountVercelToolbar()); export let data: LayoutData; </script> <main> {data.title} <!-- +page.svelte is rendered in this <slot> --> <slot /> </main> - Run your application locally to check that things are working:
You will see an error about
pnpm i run devSvelteKitError: Not found: /.well-known/vercel/flags. This happens because we already created theFLAGS_SECRETbut we did not set up the flags package yet. So let’s do this next.
- Install the
- Create your first feature flag by importing the
flagmethod from@vercel/flags/sveltekit:lib/flags.tsimport { flag } from '@vercel/flags/sveltekit'; export const showDashboard = flag<boolean>({ key: 'showDashboard', description: 'Show the dashboard', // optional origin: 'https://example.com/#showdashbord', // optional options: [{ value: true }, { value: false }], // optional // can be async and has access to the event decide(_event) { return false; }, }); - Next set up the server hook. This is a one-time setup step which makes the toolbar aware of your application’s feature flags:
src/hooks.server.ts
import { createHandle } from '@vercel/flags/sveltekit'; import { FLAGS_SECRET } from '$env/static/private'; import * as flags from '$lib/flags'; export const handle = createHandle({ secret: FLAGS_SECRET, flags }); - You can now use this flag in code. Evaluate the flag on the server, and forward the value to the client:
Accessing the value on the client:src/routes/+page.server.ts
import type { PageServerLoad } from './$types'; import { showDashboard } from '$lib/flags'; export const load: PageServerLoad = async () => { const dashboard = await showDashboard(); return { post: { title: dashboard ? 'New Dashboard' : `Old Dashboard` } }; };src/routes/+page.svelte<script lang="ts"> import type { PageData } from './$types'; export let data: PageData; </script> <h1>{data.post.title}</h1>
- Create your first feature flag by importing the
Open Vercel Toolbar locally to see the feature flag.
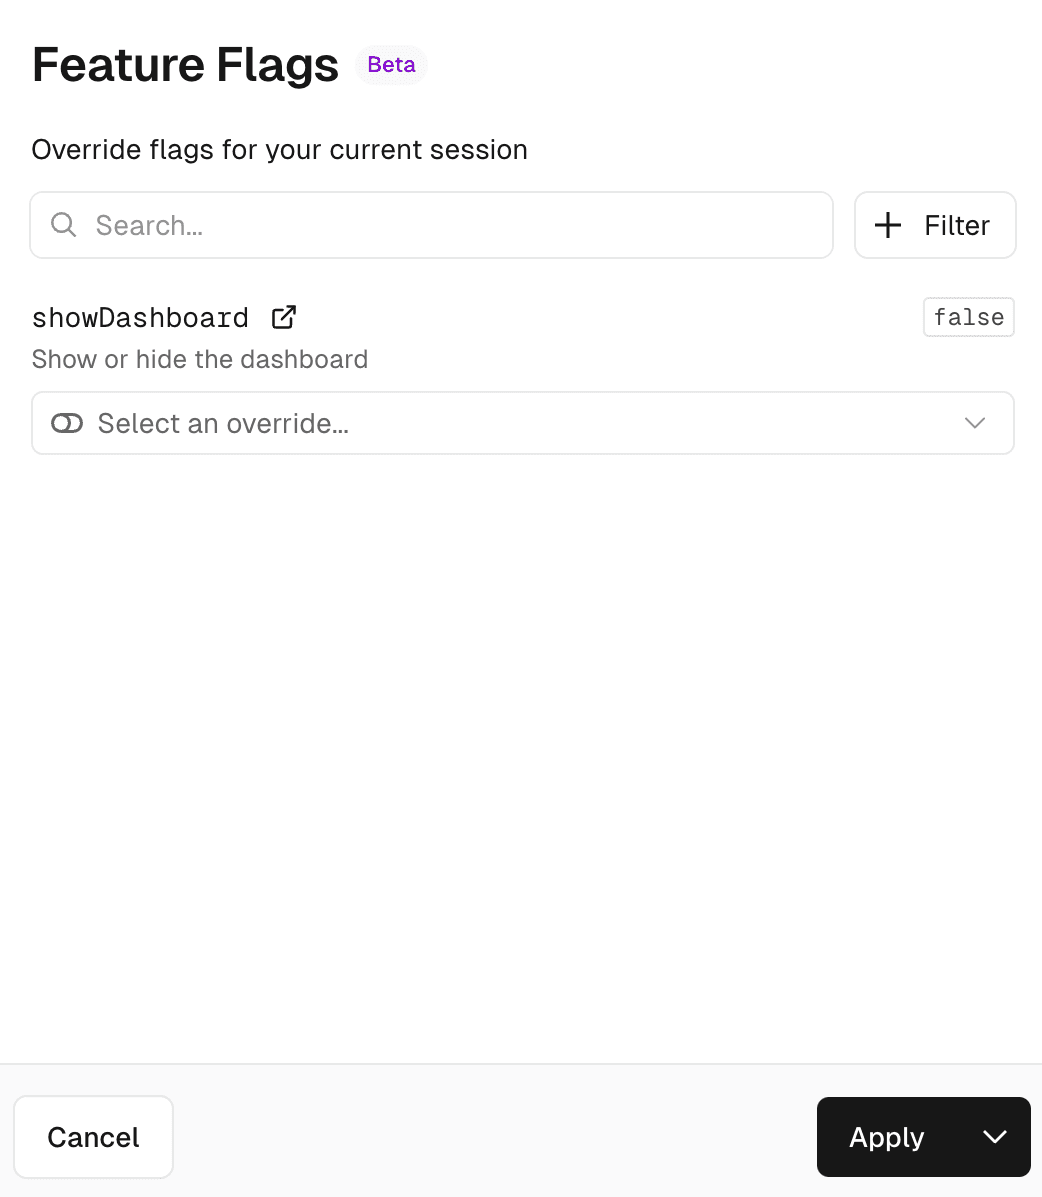

Notice how the toolbar knows about the flag's name, description and the link to where the flag can be managed. All of these are communicated through the /.well-known/vercel/flags endpoint, which is set up automatically by the createHandle call we made in hooks.server.ts.
This hook intercepts all requests and responds with the application's feature flags when it sees the authenticated request made by Vercel Toolbar to load your application's feature flags.
When you set an override using Vercel Toolbar it will automatically be respected by the feature flags defined through @vercel/flags/sveltekit.
Vercel Toolbar also shows the current value of your feature flag, in this case false. This value could be different for each visitor, so it can not be loaded along with the information about the feature flag itself.
Instead, when a feature flag gets evaluated on the server, the hook configured in hooks.server.ts injects a <script data-flag-values /> tag into the response, which contains encrypted information about the feature flag values used when generating that response. This means even if your flag would return Math.random() you would still be able to see the exact value used when generating the page.
Was this helpful?