Deploy to Vercel
Core Features
- Next.js 16: Built with the latest features of the leading React framework for performance and developer experience.
- Notion as CMS: Seamlessly manage your waitlist entries directly within a Notion database.
- Upstash Redis: Implement robust rate limiting for signups using serverless Redis.
- Resend Integration: Send transactional emails (e.g., confirmation emails) through Resend using your custom domain.
- One-Click Vercel Deploy: Get your waitlist live in minutes.
- Tailwind CSS & React: Modern, responsive UI built with utility-first CSS and React components.
- TypeScript: Type safety for a more robust codebase.
Why Notion as a CMS?
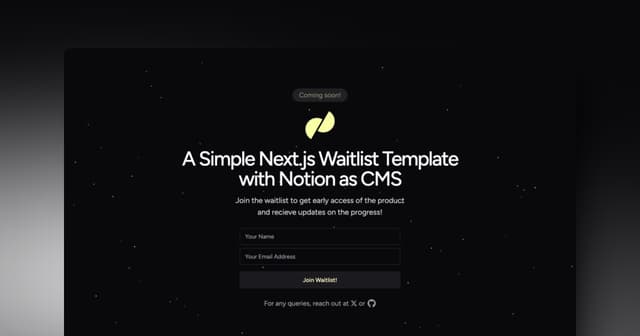
Notion is a versatile tool renowned for its content management capabilities and user-friendly interface. This template demonstrates how to leverage Notion as a lightweight, free, and effective Content Management System (CMS) for your waitlist.
Key Advantages:
- Simplicity: Manage your waitlist data in a familiar Notion database.
- No Backend Needed: Fetches data directly via Notion's API, reducing complexity.
- Flexibility: Easily extendable to manage other types of content beyond a waitlist.
- Collaboration: Utilize Notion's collaborative features if working with a team.
Prerequisites: Setting Up External Services
Before you can run this project, you'll need to configure a few external services:
1. Upstash Redis
Upstash provides serverless Redis. This template uses it for rate limiting signups.
- Sign up for a free account at Upstash.
- Create a new Redis database.
- From the database details page, note down the
REST API -> Endpoint(this is yourUPSTASH_REDIS_REST_URL) andREST API -> Read-only Tokenor a custom token with write access (this is yourUPSTASH_REDIS_REST_TOKEN). Ensure the token has write permissions if you're using it for operations that modify data.
2. Resend
Resend is used for sending transactional emails (e.g., signup confirmations).
- Create an account at Resend.
- Add and verify your domain (e.g.,
yourdomain.com). - Generate an API key from the "API Keys" section. This will be your
RESEND_API_KEY. - Note the email address you'll send from (e.g.,
waitlist@yourdomain.com). This will be yourRESEND_FROM_EMAIL.
3. Notion
Your waitlist data will be stored in a Notion database.
- Ensure you have a Notion account and workspace.
- Create a new Database - Full page in your workspace. You can name it "Waitlist Users" or similar.
- Add the following properties (columns) to your database:
Name(Property type:Title) - This is usually the default first column.Email(Property type:Email)Referral Code(Property type:Text)Referred By(Property type:Text)Referrer(Property type:Relation) (select the same database as the relation target)- (Optional)
Signed Up At(Property type:Created time) - For tracking when users signed up.
- Obtain your Notion Integration Secret:
- Go to Notion Integrations.
- Click "+ New integration".
- Give it a name (e.g., "Waitlist App Integration").
- Associate it with your workspace.
- Under "Capabilities", ensure "Insert content" is checked. If you plan to read or update entries via an API later (e.g., for an admin panel), also grant "Read content" and "Update content" capabilities. "No user information" is fine for "User capabilities".
- Click "Submit". Copy the "Internal Integration Token" shown. This is your
NOTION_SECRET.
- Share the Database with your Integration:
- Open the Notion database you created.
- Click the
•••(More) menu in the top-right corner. - Scroll down and click "+ Add connections" (or find "Connections" then "Connect to...").
- Search for and select the integration you just created (e.g., "Waitlist App Integration"). Confirm access.
- Get your Database ID:
- Open the Notion database in your browser. The URL will look something like:
https://www.notion.so/{YOUR_WORKSPACE_NAME}/{DATABASE_ID}?v={...} - The
{DATABASE_ID}is the string of characters (usually 32 alphanumeric characters) that forms the path segment after your workspace name (orwww.notion.so/) and before the?v=.... Copy this ID. This is yourNOTION_DB.
- Open the Notion database in your browser. The URL will look something like:
Local Development Setup
To run this project on your local machine:
-
Fork and Clone the Repository: First, fork this repository to your own GitHub account. Then, clone your fork:
git clone https://github.com/YOUR_USERNAME/Waitly.git# Replace YOUR_USERNAME with your GitHub username and Waitly with your forked repo name if differentcd Waitly # Or your forked repo name -
Install Dependencies: This project uses
pnpmas the package manager in the example commands. You can usenpm,yarn, orbunif you prefer, by adjusting the commands accordingly.pnpm install -
Set Up Environment Variables: Create a
.env.localfile in the root of your project. You can copy.env.exampleand fill in the values you obtained from the prerequisite steps:# Upstash RedisUPSTASH_REDIS_REST_URL=your_upstash_redis_rest_urlUPSTASH_REDIS_REST_TOKEN=your_upstash_redis_rest_token# NotionNOTION_SECRET=your_notion_secret_keyNOTION_DB=your_notion_database_id# ResendRESEND_API_KEY=your_resend_api_keyRESEND_FROM_EMAIL=you@yourdomain.com # Email address to send from (must be verified in Resend)# RESEND_REPLY_TO_EMAIL=reply@yourdomain.com # Optional: Email address for replies -
Run the Development Server:
pnpm devYour application should now be running on
http://localhost:3000. -
Run the Email Preview Server (Optional): If you're working on email templates, Resend allows local previewing of emails.
pnpm emailThis typically starts a server on
http://localhost:3001(or as configured inpackage.json).
License
This template is open-source and available under the MIT License. You are free to use, modify, and distribute it for personal or commercial projects.
Support & Contributions
Encountered a bug, have a feature request, or need clarification? Please open an issue on the original repository.
For general questions or discussions, you can reach out to Maintainers on X (formerly Twitter).
Contributions are welcome! Please feel free to fork the repository, make your changes, and submit a pull request.